To build a PC of your own takes a bit of time and research to find the hardware you want. Once done you can assemble it as you would a big puzzle. I will provide a list of the parts that went into my latest system and how I put all the parts together and what the final product looks like. Make sure you read the motherboard manual carefully before building your new PC. Also keep the manual handy while putting everything together. You will need it when you get to wiring things up. While this guide is intended for the novice PC builder, it is not the final say in putting a PC together. Intermediate and expert builders will see this as easy to understand as that is how I meant it to be. One word of caution when building a PC. Static electricity is harmful to PC parts. Make sure you are grounded either with a grounding strap that is available at computer stores or Radio Shack or by touching the power supply to discharge any static electricity.


Parts


  1. CPU: AMD Athlon XP 3200+ Running at 200mHz (400 mHz effectively) FSB
  2. Motherboard: ASUS A7N8X Deluxe
  3. Memory: 1024MB Corsair XMS Low Latency PC3200 RAM Running in Dual Channel Mode
  4. Video Card: VisionTek GeForce 3 Ti 500 (my GF 5950 Ultra bit the dust)
  5. Hard Drive: Western Digital WD2000JB 200GB @ 7200RPM (master)
  6. Hard Drive: Western Digital WD800JB 80.0 GB @ 7200RPM (slave)
  7. Hard Drive: Western Digital WD300BB 30GB @7200RPM
  8. CDROM Manufacturer & Model: Lite-On LTN529S 52x
  9. CDR/CDRW Manufacturer & Model: Lite-on LTR52246S 52x24x52x
  10. DVD Manufacturer & Model: Lite-On LTD-166S DVD16X (purchased just a few weeks before I originally wrote this up.)*
  11. Sound Card: Creative SoundBlaster Audigy 2 ZS Gamer
  12. Floppy Disk Drive
  13. Antec TruePower 2.0 550W PS
  14. 3 Antec 120mm Case Fans (came with case)
  15. 1 Antec 80mm Case Fan (installed this fan in the VGA duct of my case)
  16. Zalman 7000-Cu Blue LED heatsink/fan for CPU
  17. Antec P-180 case
  18. Cable ties
  19. Split wire wrap or wire looms (to tidy up your cables to present a neat look inside your case and help promote better airflow
  20. Round IDE and FDD cables
  21. Promise Ultra 100 TX2 IDE controller


Assembly


Gather up all of your parts to one spot. In my case I had to buy the new motherboard, CPU and RAM for the upgrade. I did buy the 2 Antec LED (now not used due to using a case with no window, but if you have a window, LED case fans provide a way to see inside) case fans and the new Lite-On CD-ROM. To use 3 optical drives you will have to get an IDE controller card to add into the PC. The rest of the hardware I already had from prior purchases/upgrades which is a good way to upgrade/build a new PC without having to spend hundreds of dollars for a good PC. Remember that building your own PC means you know what hardware is in it and you can build one for upgradability in the future. Do remember to wear clothes that don't create static electricity and you do not do this in a carpeted area. If you have a grounding strap (it's preferable to have one), use that to ground yourself to your case.

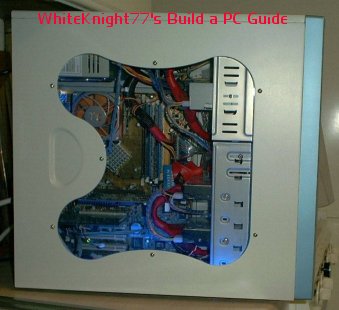
Take your case and remove the side(s) that allows you access to the inside of the case. Some ATX cases do not allow you to access anything from the right side of the case as you look at it from the front. BTX cases are accessed from the right side of the case. The Antec P 180 case I am currently using is sort of a hybrid ATX case with the PSU at the bottom of the case as the BTX specs state, but the motherboard area is all ATX spec.

Antec P 180

Now take your motherboard and place it on the motherboard tray from the case (if you bought a case with a removable motherboard tray) and check where you need to place the stand offs:
Standoffs

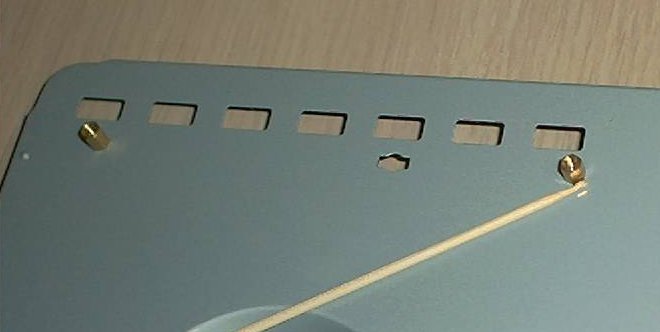
You can mark the holes with a felt tip pen to know where you have to screw the standoffs into. Make very sure you install the standoffs into the proper holes as if you don't you can short the board out on first start up or it won't even boot up. Once the standoffs are installed you can assemble your motherboard.
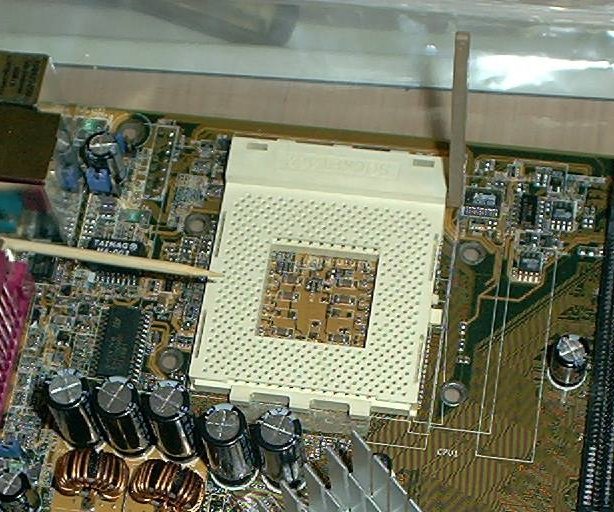
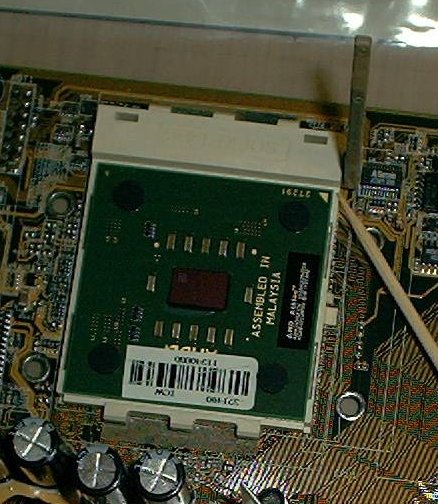
To install your CPU, lift the locking arm up and place the CPU in the socket with the little triangle (or other mark) on the CPU where the hinge for the locking lever is:
CPU Socket
CPU

Once the CPU is set in it's socket, lock it down, but do not force anything. You do not want to break anything. Once you have the CPU installed it's time to get the HSF installed. Depending on what you plan to do with your PC in the overclocking area, You should get a tube of Artic Silver 3 to use instead of using the thermal pad that comes with what every HSF you get. Make sure that if you take the thermal pad off the HS, you thoroughly clean the metal with acetone then rubbing alcohol to make sure it's clean. Place a small grain of AS3 onto the heatsink then smooth it in a baggie encased finger, then wipe so there is just a thin coat left with a lint free cloth and then place the heatsink and fan combo onto your CPU. Lock it down on the socket clips being careful not to crack the core of your CPU while doing so. If you have a HSF like a Zalman that requires you to install standoffs or brackets to the motherboard to support the unit, install it prior to installing the motherboard.
Heatsink and Fan with AS3
Heatsink and Fan installed

Connect the fans wires to the CPU header for the fan. This is a must or your PC may not even boot up when you first start it up.

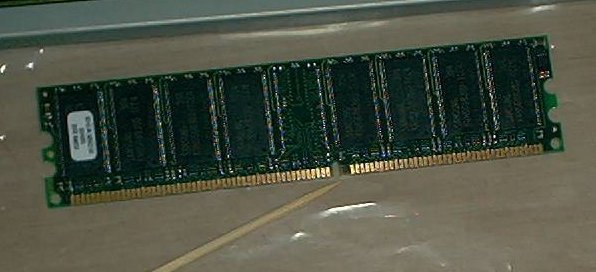
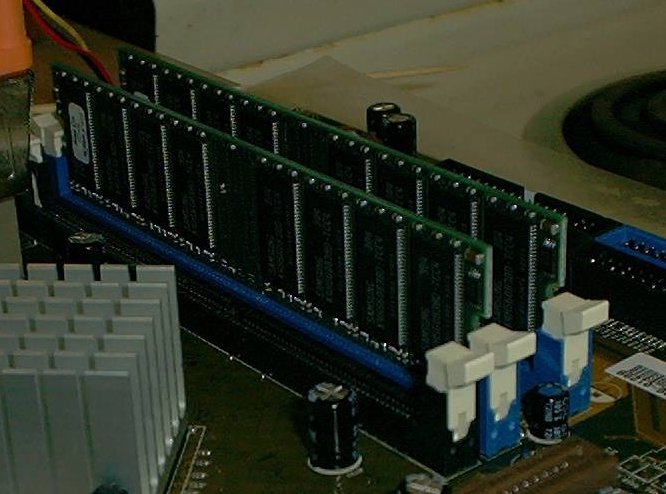
Install your RAM into their sockets and push down carefully until the RAM is competely seated and the locks are latched. RAM can only be installed one way. Make sure the notch as indicated by the pointer is in the right place according to the motherboard. If the notch doesn't line up either way, you may have picked up the wrong kind of RAM. Get the right RAM now while you still have the motherboard out. You won't have to worry about trying to install it in a smaller work area and you will be able to see what you are doing.

PC3200 DDR SDRAM 256MB stick
RAM Installed into their proper slots

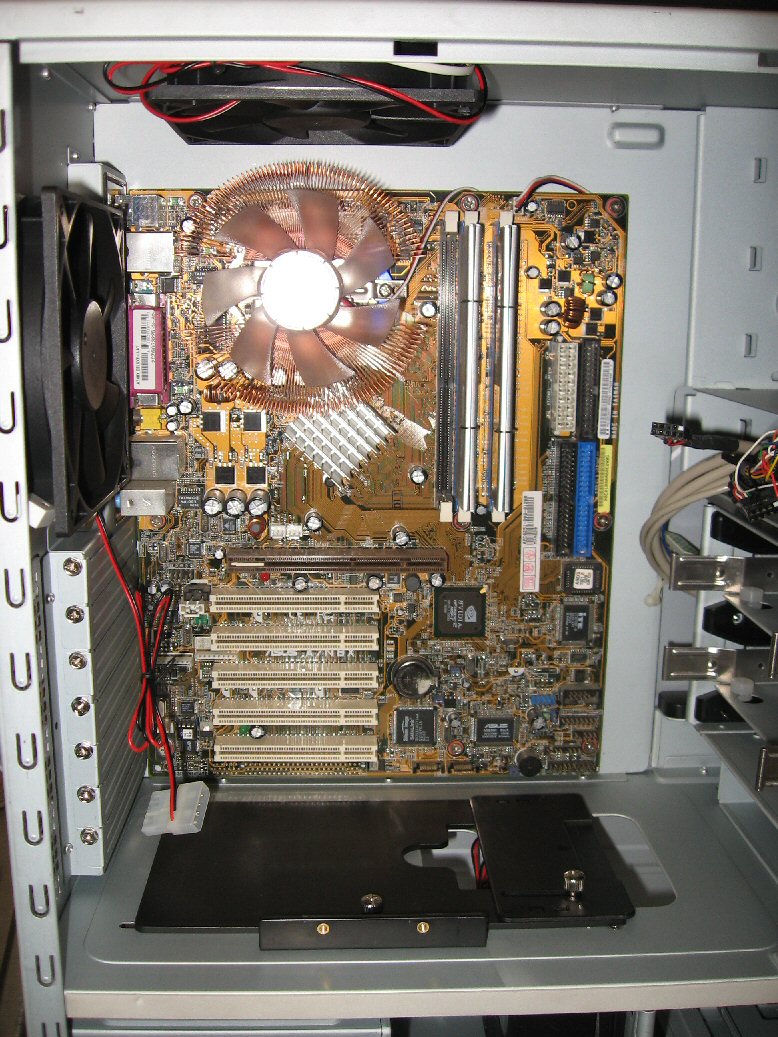
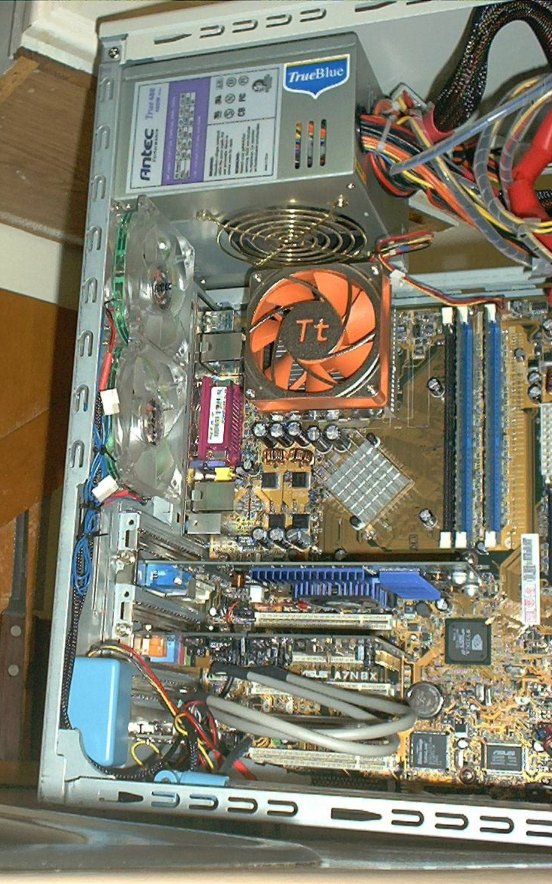
Once these items are mounted on the motherboard, mount it onto the motherboard tray you installed the standoffs on earlier. Make sure that you put a screw in every hole that you can for support. If you have the paper washers, use them under the heads of the screws before installing the screws. Once that is done 
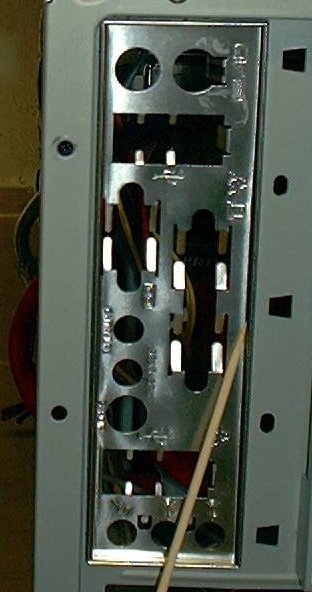
install the IO plate that came with the motherboard in the back of the case before installing the motherboard and tray back into the PC.

IO Plate Installed onto the back of the case

Install the motherboard and tray when done. Make sure all of the connectors on the motherboard are in their proper places in the IO plate on the back of the case.
Motherboard installation


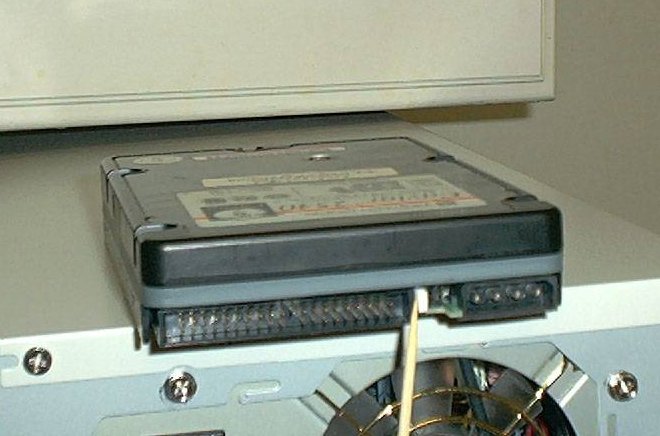
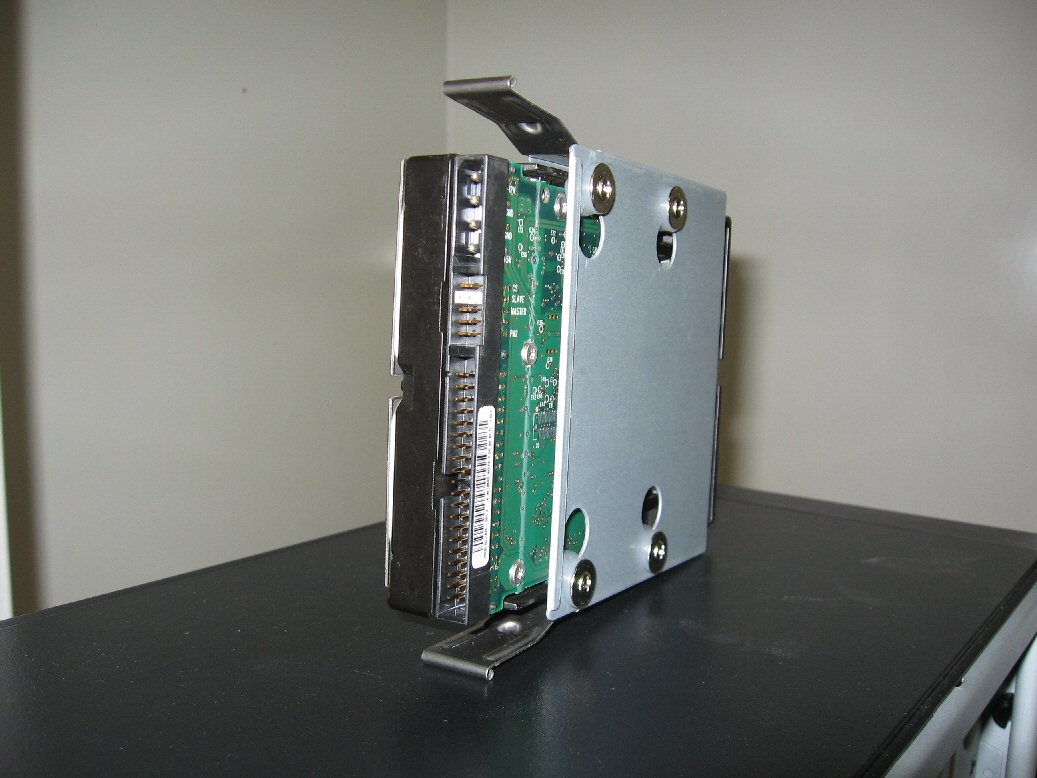
If you have new drives or are adding more drives as you build your PC, you will need to make sure the jumpers are set properly as you see here:

CD Jumper Setting
HD Jumper Setting

Make sure your drives both ODD and HDD are set to either master or slave depending on it's place on the IDE cables so your PC will know what does what when.

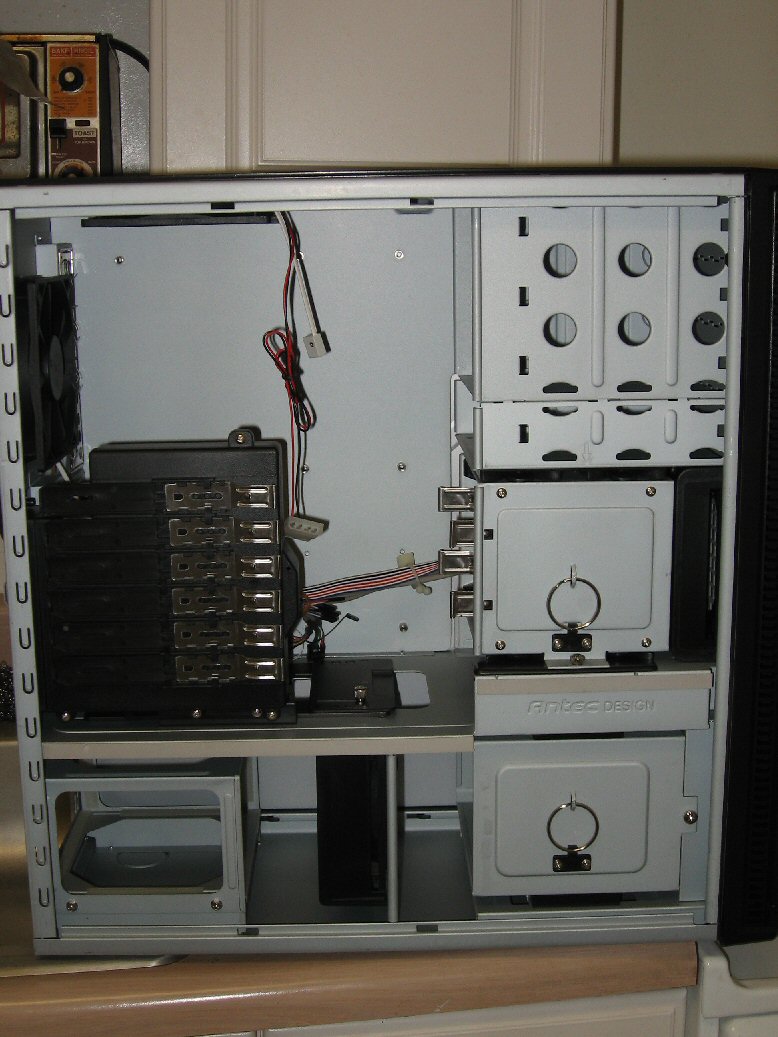
Install your drives in the case where you want them or if you have removable drive cages, install them in the cages. If your cages have silicone or rubber grommets, ensure that they are in place and that you do not overtighten the screws. If you have rails, install them too. Install all drives and cages into their respective spaces once you have finished.

Drive Rails
Cage and Rails Installation
Cage with Grommets
Optical Drives Installation

You can put them in any order you want, but make sure your master drives are located where the end of the cable can reach. If you do not have as many drives as I do, you can install the drives so you have an airgap between them to help keep them cool. I use an add in IDE controller card to run all my drives along with a third round IDE cable.

Next install the wiring for any Firewire or extra USB ports that may come with the motherboard along with the wiring for the power button, system speaker, HDD activity light, reset button and any audio wires that may be with the case which may even include from panel USB ports.

Add-in cards and wires for Firewire and front audio

Once this is done, you can install any add in cards you have like a video card, sound card, and any network card(s) or modem you may have also. Make sure that they are seated firmly in their proper slots then secured with the screw. The following page will show you where such items go.


Page 2


Copyright © 2001-2006 WhiteKnight77
All content is property of WhiteKnight77 and is for information only. If by following these instructions and your PC does not work, I am not to blame. Before building your own PC it is your responsiblity to research what you are wanting to do. If you are careful and take proper precautions, you should have no problems with building a PC this way.

Updated 8-2-2002